Free Man is one of the sixteen endings in Completing the Mission.
This pathway is selected by choosing the "Relentless Bounty Hunter" and "Ghost Inmate" endings.
Plot
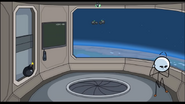
Henry wakes up in a cell on board of the Toppat Orbital Station. He is greeted by the Right Hand Man, who is now a cyborg and in charge of the Toppat Clan since Henry got Reginald Copperbottom arrested during his mission aboard the Toppat Airship.
Right Hand Man tells Henry how he personally had him captured because of what Henry did to Reginald and himself, and mocks him for his predicament. Henry naturally plans an escape. First, he needs to get out of his handcuffs and has the following options:
- [X] Remote: Henry swings for the remote on the wall, and pushes a button with his feet. This however opens a hatch underneath him and he is ejected from the space station, and dies in the vacuum of space, in Among Us style. Message: Hmm... seems there is still an impostor Among Us.[1][2]
- [X] Inner Strength (fail): Henry tries to break out of his cuffs, but they are too strong for him. Message: You can't break those cuffs.
- [✓] Magic Spell: Henry magically breaks out of his cuffs using a thunder spell.
Now that he is free, Henry has to open the door of the cell. He can use these options:
- [X] Lockpick: Henry attempts to unlock the door with the lockpick, but it simply has no lock. For the first five times this option is selected, it doesn't count as a fail and the player is simply returned to the choice screen. At the sixth Lockpick attempt, the game gets agitated enough to add a lock to the door for Henry to pick. Henry successfully opens the door, but a Toppat, Holey Cap, immediately holds him at gunpoint, leading to the actual fail. Message: You should've just moved on to something else...[3] [Getting the actual fail will grant you the 'Lockpick Pro' achievement]
- [X] Melt Ray: Henry aims the gun at the door and fires, but instead of melting the door, the gun literally melts itself. Message: It melted alright.
- [X] Bomb: Henry detonates a bomb, realizing too late that he is too close to it. The explosion kills him, either directly or breaking his cell's walls and causing all the air to be sucked out. Message: Door's open.[4]
- [✓] Metal Hat: Henry puts on the hat, and turns into metal. He then slams through the door taking out Holey Cap.[5]
Henry breaks out and runs through the station, being protected from gunfire due to his metal form. The transformation wears off when he reaches Armory 7. Henry quickly locks himself inside, and as Fredrick Muenster, accompanied with Chuck Wellington and The Bookie, gather around the door, he has to choose which weapon to use to make his getaway:
- [X] Underbarrel Grenade Launcher: Henry launches a grenade at his foes, but it blasts a hole in the hull, creating a vacuum that sucks the 3 Toppats and Henry into space. Message: Who brings a grenade launcher onto a space station?!
- [X] Big Sword : Henry attacks The Bookie with the sword and kills him, but the Sword gets stuck in the ground in the process. Henry is unable to lift it, rendering him defenseless. Message: That's a big boy sword. For big boys only.[6]
- [✓] Pew Pew Gun: Using a retro light gun, Henry proceeds to kill Chuck, Bookie, Fredrick and Fred Finestone with ease, and continues his escape.
Henry fights his way to the cafeteria, where the Right Hand Man awaits him. Henry is about to shoot, but Right Hand Man throws Henry onto the floor and prepares to finish him. Henry can:
- [X] Harden: Henry turns himself to stone, but the Right Hand Man easily shatters him regardless. Message: It's not very effective...
- [X] Sweep the Legs : Henry kicks at the Right Hand Man's legs, but since his legs are made of metal, Henry only succeeds in hurting himself. The Right Hand Man proceeds to beat Henry to a pulp. Message: That's gonna be an 'Ouch' from me, Dawg.
- [✓] Nano-Suit: Henry summons the suit, which forms around his body. He blocks a punch from the Right Hand Man before he breaks through the cafeteria's glass window and flees into space, with the Right Hand Man following close behind.
The Right Hand Man tries to shoot Henry with his laser eye, while Henry runs down one of the station's solar panels. Henry can:
- [X] Timeout: If no option is chosen, Henry is shot by Right Hand Man's laser. Message: You don't have time to read the instruction manual for that suit!
- [X] Fire Missiles: Henry activates a missile and aims it at the Right Hand Man, but he flies alongside the missile because he fired it while it is still attached to his suit. The Right Hand Man gets surprised before the missile and his opponent, Henry, hit him, with the explosion killing them both. Message: The release mechanism is located near your thumb on the right hand. It’s a small button with a missile symbol on it. All you need to do is hit that to fire off the missile. WARNING: If you do not disconnect the missile it may activate while still connected to your suit.
- [X] Positron Refractor: Henry activates his refractor and reflects the lasers, but the Right Hand Man proceeds to smash him with his fist. Henry jettisons off to the left, his body bursting into a flame pillar that extends to the right when he gets far enough, similar to when Grigori and Ellie exploded by Henry when he used The KNEE on both of them. Following afterwards, the "GAME" word from the Super Smash Bros. franchise appears on the screen. Message: Unfortunately, it only reflects projectiles.[7]
- [✓] Max Gravity Boots: Henry uses the suit's gravity boots to break through the solar panel, shattering it.
He then hides among the debris, as Burt Curtis warns the Right Hand Man about the damage. Henry spots three satellites nearby, as well as a way back to Earth. He can:
- [X] Go to Earth: Henry leaps into the atmosphere, expecting the nano suit to protect him from burning up. This does not happen, and Henry is reduced to ashes. Message: Toasty!
- [X] Left Satellite: Flying towards the Left Satellite, Henry attempts to use it to destroy the orbital station. However, the satellite is not weaponized, as it is only a mere communications satellite. Burt picks up the attack inputs and tells the Right Hand Man in confusion, who soon locates and kills Henry. Message: Next time you want to attack, don't use a communications satellite.
- [X] Laser Satellite: Leaping to the Laser Satellite, Henry attempts to use its laser to attack the space station. Except the satellite is actually aimed towards Earth—the blast hits the planet instead. The Right Hand Man catches up to Henry at the satellite. Message: FRONT TOWARD ENEMY
- [✓] Drop Pod: Henry leaps to the Drop Pod. Henry gets on board and sets its destination to Earth, putting it on a direct collision course with the Orbital Station.
With alarms flaring on the station, Burt warns the Right Hand Man about the fact that Henry is about to crash into the Orbital Station. He attempts to stop Henry's drop pod from taking off, but it's no use– the pod penetrates through the space station, striking their central core, and flies towards Earth. Henry survives the whole ordeal and disembarks from the drop pod on Earth, now free from the Toppat Clan.
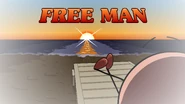
The Right Hand Man also survives the ordeal and returns to the space station, now without power due to the loss of the station's central core, rendering The Toppats to be unable to return to Earth without any power, thus they are stranded in space. Burt questions the Right Hand Man about the identity of the prisoner and the reason why he imprisoned him in the first place. After all that, Henry can be seen relaxing by the shore of a beach by sitting on a beach chair.
Characters
- Henry Stickmin
- Right Hand Man (Reborn)
- Holey Cap
- Fredrick Muenster
- The Bookie
- Chuck Wellington
- Fred Finestone
- Burt Curtis
Italics indicate they only appear in this pathway.
Trivia
- Out of all the endings in the series, this ending has the least amount of:
- Letters for its name (7)
- Flashback screens (6)
- and Characters out of all endings in Completing the Mission (8).
- This ending has the most screens of any CtM ending, with 6 real screens, tied with Toppat King and Special BROvert Ops.
- Of these, Free Man has the most fails, at 15, closely followed by Toppat King at 14 and then Special BROvert Ops at 13.
Music
| Track | Composer/Artist | Notes |
|---|---|---|
| 🎧 "Not Again" | PuffballsUnited | Opening theme. |
| 🎧 "Metal Hat" | PuffballsUnited | Played during the "Metal Hat" scene. |
| 🎧 "Stranded" | Ockeroid | Ending theme. |
Notes
- ↑ A white Among Us character is seen in this scene, linked to the "Assemble the Crew" medal.
- ↑ Referencing Puffballs's other game, Among Us.
- ↑ Choosing the Lockpick six times in a row and seeing the actual fail grants the "Lockpick Pro" medal.
- ↑ Possible reference to DOOR STUCK! DOOR STUCK! video
- ↑ The Metal Hat is a reference to the N64 game Super Mario 64, where a power up exists in it that grants the player a "metal" body and invulnerability for a temporary amount of time
- ↑ The Big sword fail is a comedic reference to Cloud's Buster sword from FFVII~
- ↑ The Positron Refractor references the Reflector that Fox McCloud can use when he triggers his Down Special Move.


